
How to auto approve request using Power Automate?
Use Case
We usually come across situations where a request is pending for a long period of time. If no action is taken on such requests, then we can implement power automate flow to approve such requests in a time bound manner. In this tutorial, we will take an example of leave request & auto approve it after 3 days.
Scenario
Leave requests are submitted in custom SharePoint list. The request will be routed to manager for his/her approval. If its pending approval for 3 days, then request will auto be approved & closed.
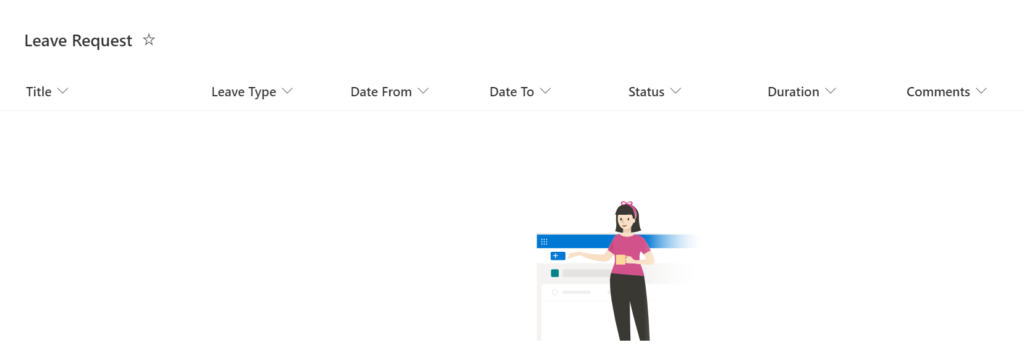
The schema for custom “Leave Request” SharePoint list:
Solution
1. Create automated flow & choose “When an item is created” as trigger. Set the flow name as shown below:

Select the SharePoint site collection URL & list name from the dropdown:

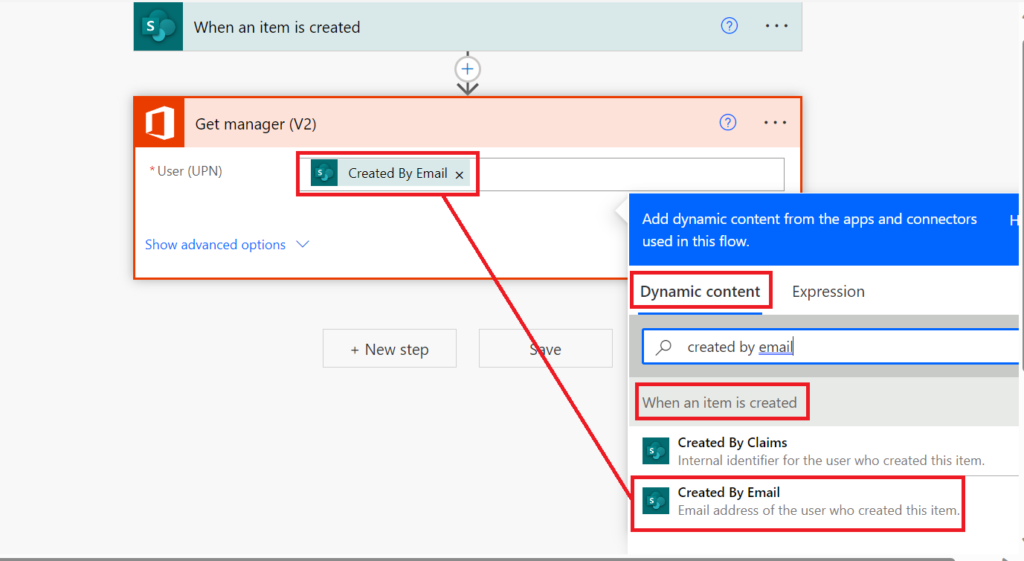
2. Next, add “Get manager” action to retrieve the manager of person who submits the request. Dynamically pass the email address of the created by from SharePoint list:
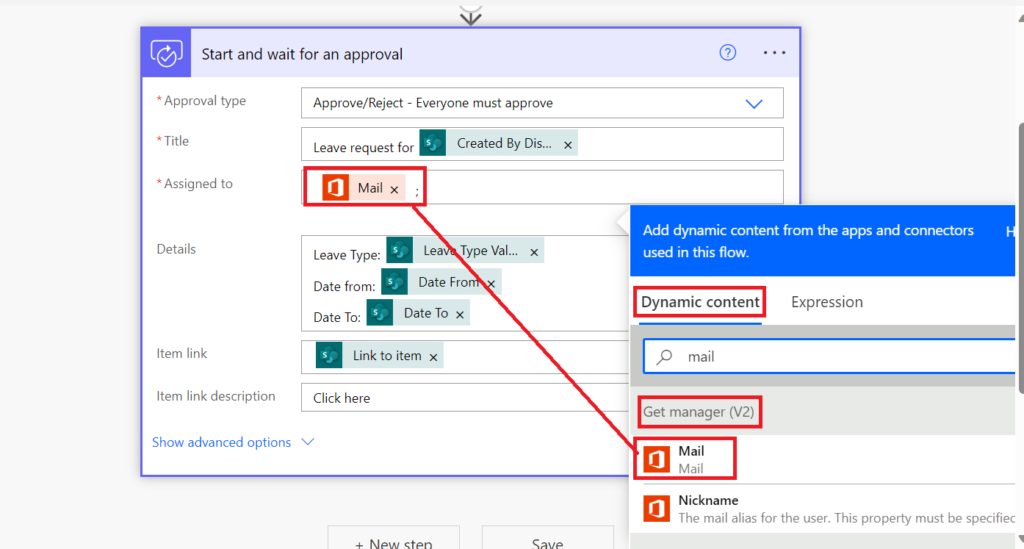
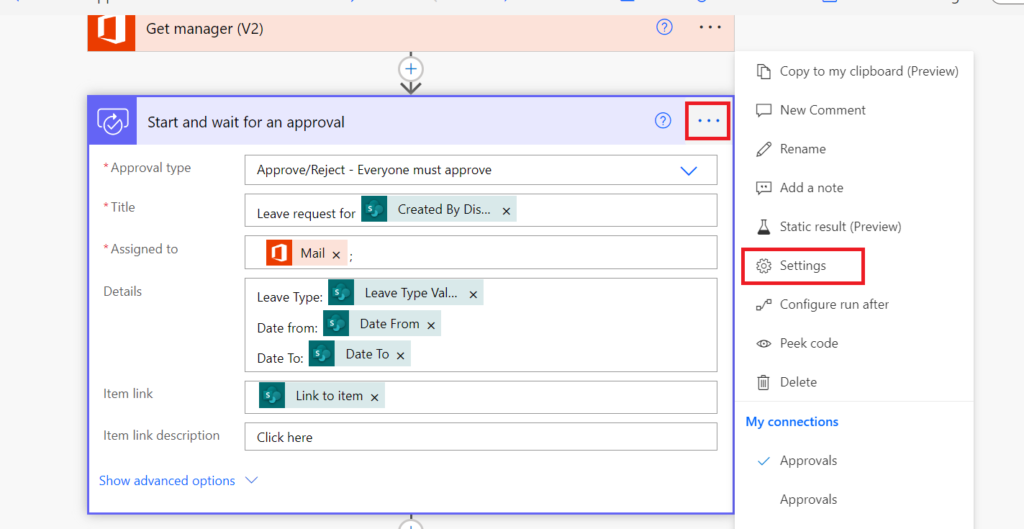
3. Initiate approval process by adding “Start and wait for an approval” action. Pass the email address of the manager as approver in the approval action:
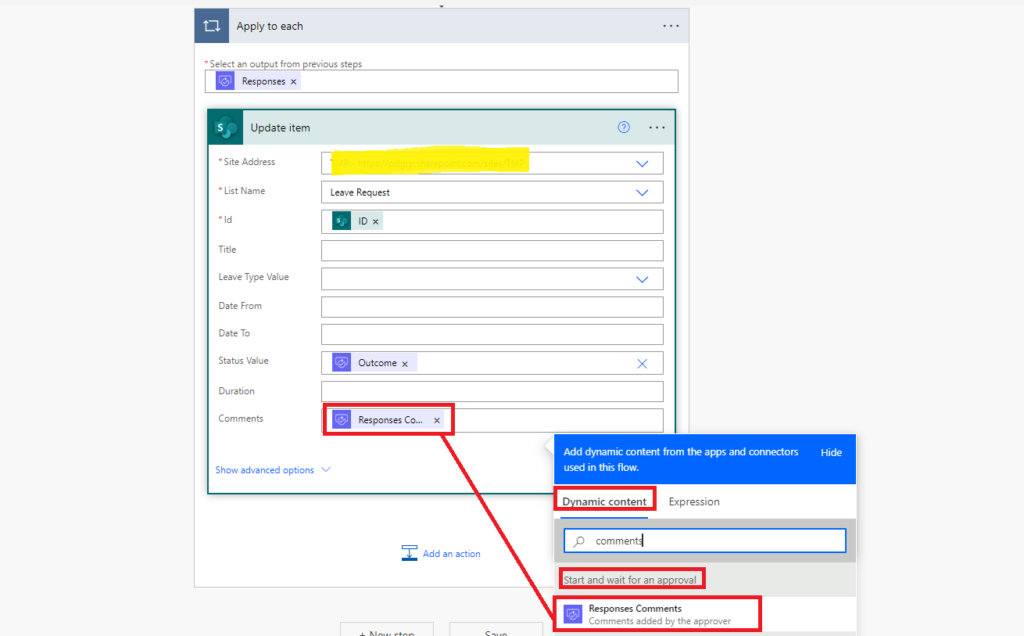
4. Following approval action, add “Update item” action to update the status of the request and comments from the approver. When you pass responses comments to update item, ‘Apply to each’ action will be automatically added.
Pass the ID of the Item from the trigger. Similarly, pass the Outcome & ‘Responses Comments’ to Status & Comments columns respectively:
Close “Apply to each” action and add “Send an email” action to notify requester. Pass the outcome dynamically in the email subject and other details from SharePoint list:

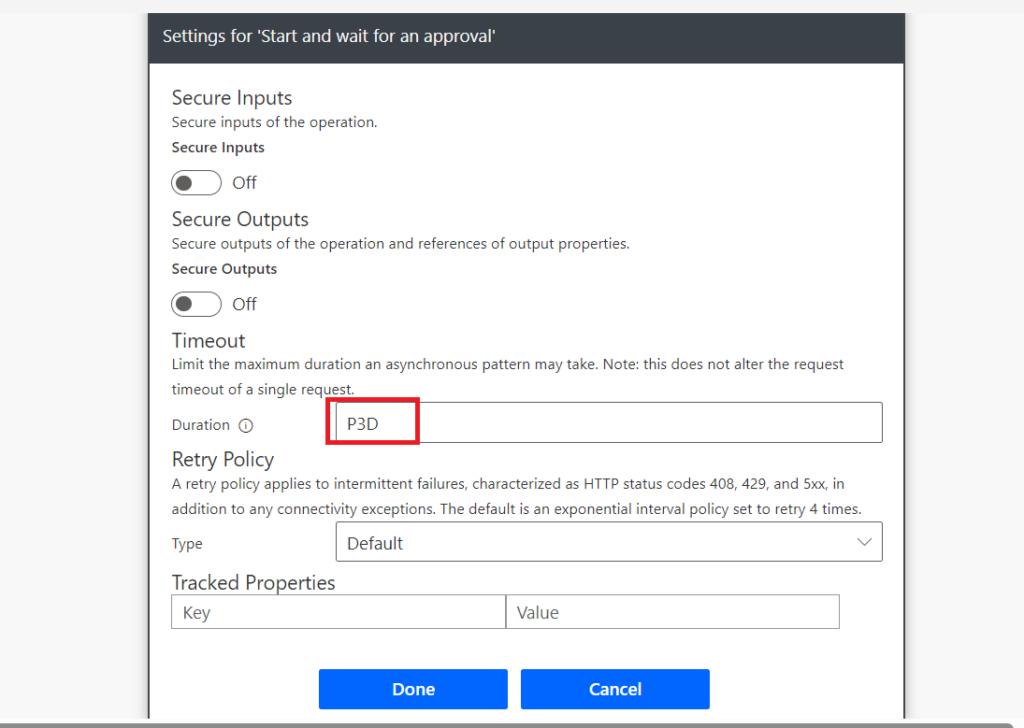
5. So far, we have the happy flow which works if approver takes action within 3 days. Now, lets work on the other part which auto approves it. Go back to “Send and wait for an approval” action, click (…) and choose “Settings” from sub menu:
Scroll down to “Timeout” block & set “P3D” in duration textbox. Click “Done” to save the changes. With timeout setting, the approval action if pending will time out after 3 days.
Timeout duration is specified using ISO 8601 format ISO 8601 - Wikipedia. Here's the format:
P[n]Y or P[n]M or P[n]D or PT[n]H[n]M[n]S or P[n]W
Here are a few examples:
2 weeks -> P2W
10 days -> P10D
5 hours -> PT10H
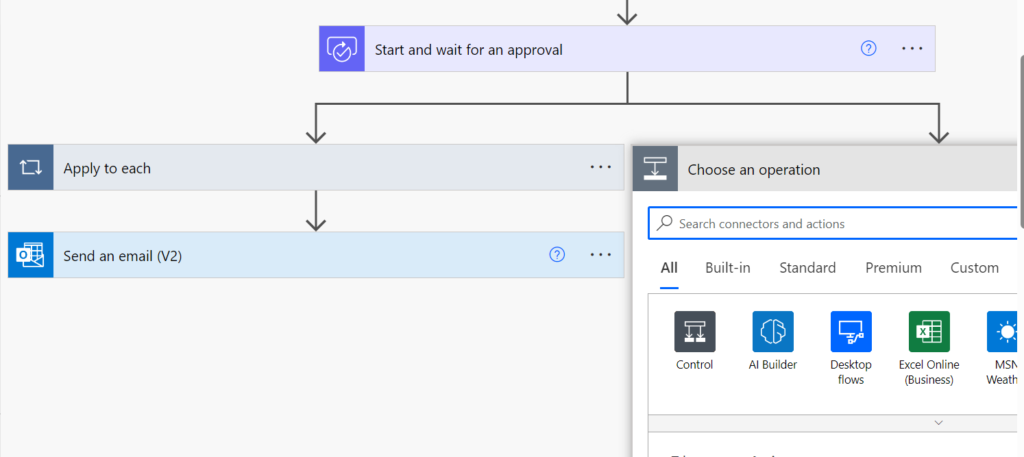
45 minutes -> PT45MFollowing setting timeout, add parallel branch from “Send and wait for an approval” action as shown below:
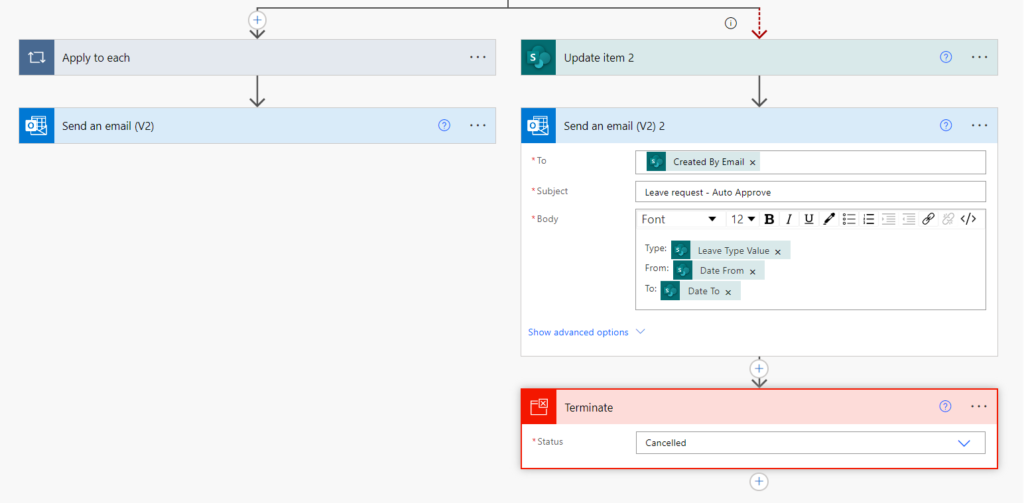
On the right branch, add another “Update item” action. This will update the list item status & comments. Pass the ID from the trigger:
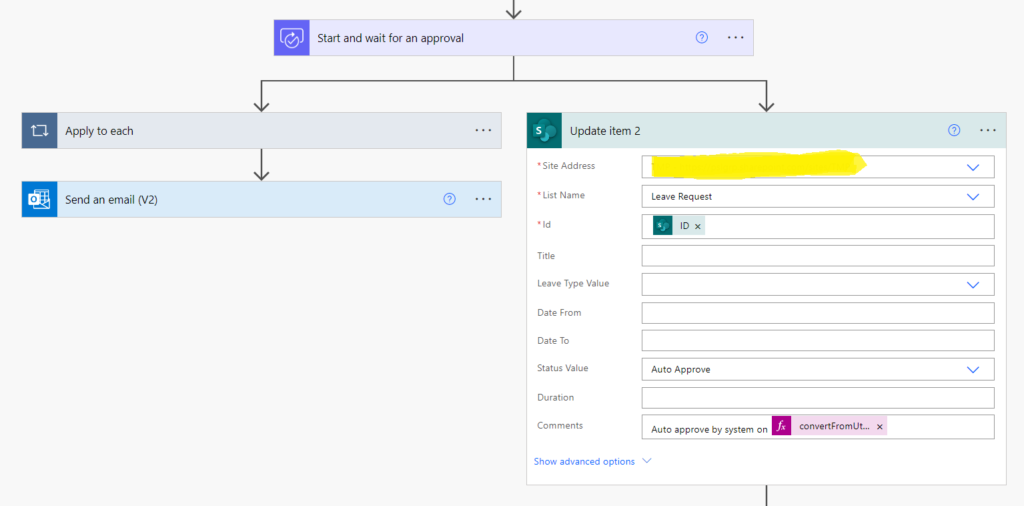
Set Status column value to “Auto Approve” and enter the below text in the Comments column. Please adjust the time zone as per your need:
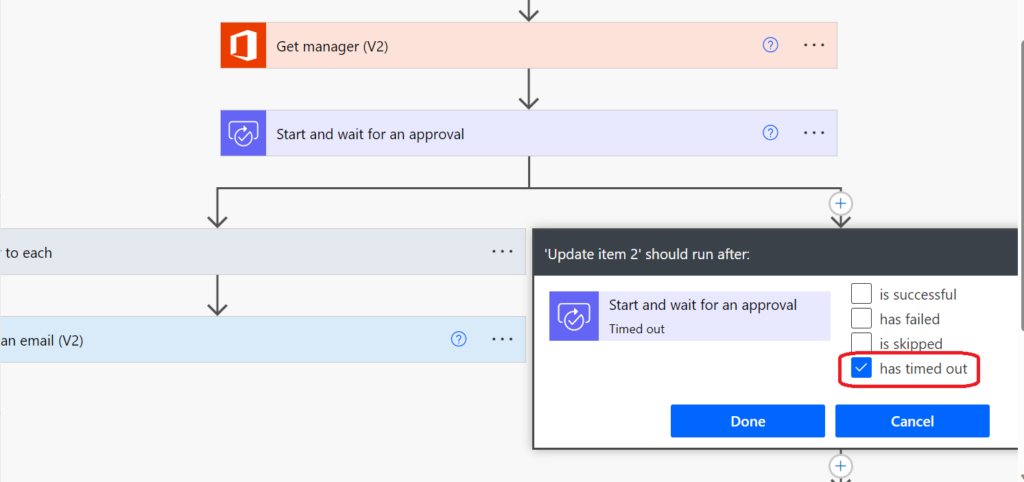
Auto approve by system on @{convertFromUtc(utcNow(),'India Standard Time','dd/MM/yyyy')}To configure update action to execute if approval action times out, click (…) & select “Configure run after” from the sub menu:

Check “has timed out” and click “Done” to save the changes:
Finally, notify user about auto approval. Add “Send an email” action on the right branch just below Update item. Set the required input parameters like ‘To’, ‘Subject’, ‘Body’ etc. and eventually cancel the flow by adding “Terminate” action:
Output
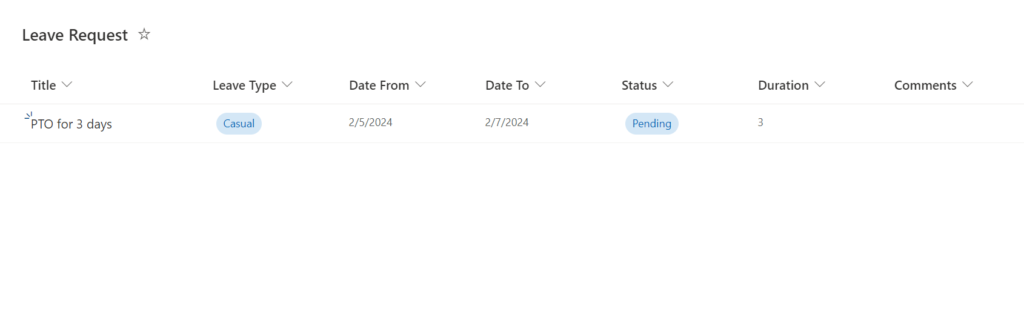
Request submitted in SharePoint list:
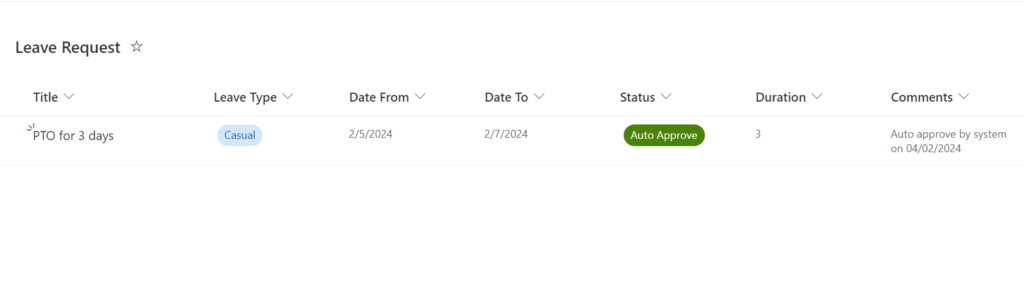
List item update after time out period:
Flow execution history:

Conclusion
Using “timeout” setting, we could auto approve task or take auto actions for any time bound processes. The same concept can be applied to “Send an email with options” action if approver does not respond timely.
Hire Me for Power Automate Consulting
I offer expert Power Automate consulting at $50/hour with a minimum booking of 10 hours. If you’re looking to streamline workflows or automate business processes, I’d love to help.
📩 Message me on LinkedIn to reserve your slot.